|
| |
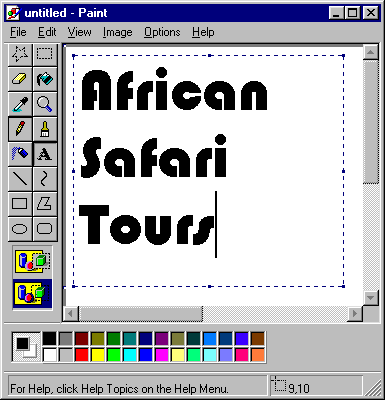
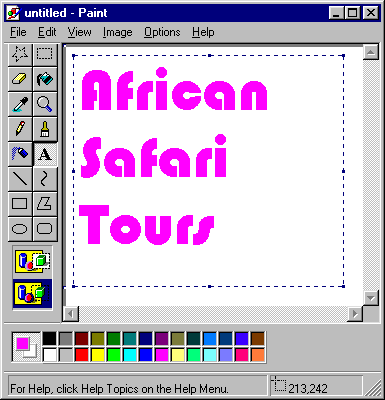
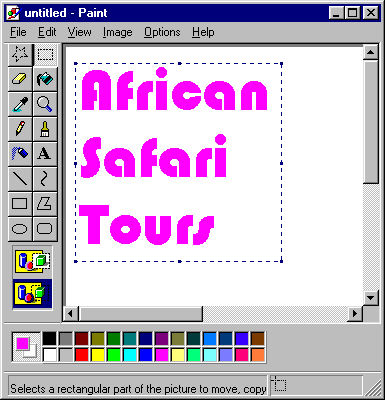
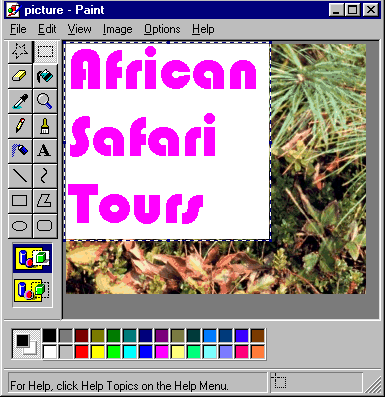
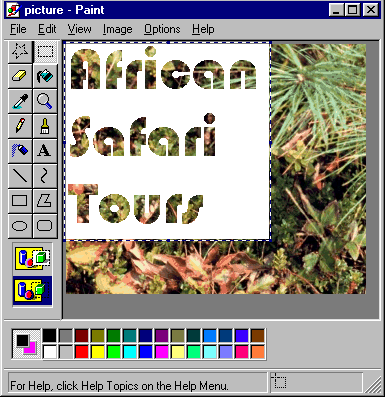
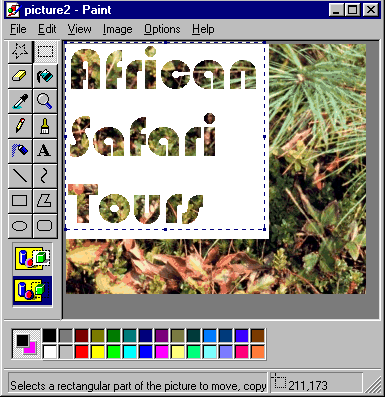
How To Make Text From ImagesChapter 2: Making Text From Images With Windows PaintIn this Chapter, I'll show you a technique to create Text from Images using the Paint accessory that comes with Microsoft Windows.You can also use similar techniques with most painting programs. Here's the steps:
|
||||||||||||||||||||||||
| Disclosure: Our company's websites' content (including this website's content) includes advertisements for our own company's websites, products, and services, and for other organization's websites, products, and services. In the case of links to other organization's websites, our company may receive a payment, (1) if you purchase products or services, or (2) if you sign-up for third party offers, after following links from this website. Unless specifically otherwise stated, information about other organization's products and services, is based on information provided by that organization, the product/service vendor, and/or publicly available information - and should not be taken to mean that we have used the product/service in question. Additionally, our company's websites contain some adverts which we are paid to display, but whose content is not selected by us, such as Google AdSense ads. For more detailed information, please see Advertising/Endorsements Disclosures Our sites use cookies, some of which may already be set on your computer. Use of our site constitutes consent for this. For details, please see Privacy. Click privacy for information about our company's privacy, data collection and data retention policies, and your rights. Contact Us Privacy Terms Of Use Advertising/Endorsements Disclosures Copyright © 2005-2020, Answers 2000 Limited In Association With Amazon.com Answers 2000 Limited is a participant in the Amazon Services LLC Associates Program, an affiliate advertising program designed to provide a means for sites to earn advertising fees by advertising and linking to Amazon.com. In Association With Amazon.co.uk Answers 2000 Limited is a participant in the Amazon EU Associates Programme, an affiliate advertising programme designed to provide a means for sites to earn advertising fees by advertising and linking to Amazon.co.uk. As an Amazon Associate, our company earns from qualifying purchases. Amazon, the Amazon logo, Endless, and the Endless logo are trademarks of Amazon.com, Inc. or its affiliates. CERTAIN CONTENT THAT APPEARS ON THIS SITE COMES FROM AMAZON SERVICES LLC. THIS CONTENT IS PROVIDED 'AS IS' AND IS SUBJECT TO CHANGE OR REMOVAL AT ANY TIME. CERTAIN CONTENT THAT APPEARS ON THIS SITE,COMES FROM AMAZON EU S.ą r.l. THIS CONTENT IS PROVIDED 'AS IS' AND IS SUBJECT TO CHANGE OR REMOVAL AT ANY TIME. All trademarks are property of their respective owners. All third party content and adverts are copyright of their respective owners. Some graphics on our web sites are Copyright (C) 1997-2000 Hemera Technologies Inc., and used under license. All such pictures are provided for viewing purposes only and are not to be saved or downloaded. All such pictures of recognizable individuals are models and used for illustrative purposes only, and not meant to imply any association or endorsement of said individual with any product or service. |
|